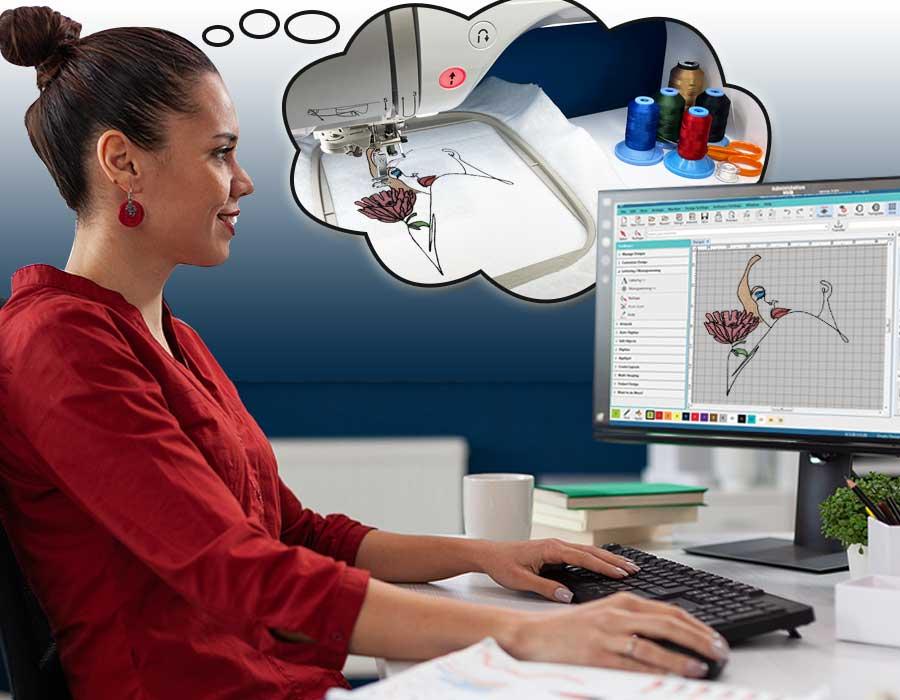
You have a sleek logo and a capable Babylock embroidery machine. The gap between that digital image and a professional-looking stitched emblem, however, can feel vast. In 2025, the process to Convert Logo To Embroidery For Babylock blends time-tested craftsmanship with smart, modern tools. It’s no longer just about making a file; it’s about creating an optimized digital asset that leverages your machine’s capabilities for flawless, efficient results. Whether you’re personalizing gifts or fulfilling client orders, following current best practices ensures your embroidered logo looks crisp, lies flat, and perfectly represents your brand. This guide walks you through the updated workflow that defines quality today.
Introduction: The 2025 Mindset for Logo Digitizing
Gone are the days of relying solely on shaky auto-digitizing and hoping for the best. The best practice for 2025 is a strategic, informed process. It recognizes that your Babylock machine is a precise partner, and the file you feed it must be engineered with intention. This means prioritizing communication with digitizers, leveraging new software features, and understanding the full production cycle—from digital vector to physical stitch. It’s a holistic approach that saves time, reduces material waste, and guarantees a result you’re proud to display or deliver.
Phase 1: Pre-Digitizing Preparation (The Foundation)
The most critical step happens before any digitizing software is opened. Success is built here.
1. Audit Your Source Artwork:
Locate the original vector file (.AI, .EPS, .SVG, or a high-resolution .PDF). Vector art is non-negotiable for professional results in 2025. It provides clean, scalable paths that digitizing software can trace with mathematical precision. If you only have a raster image (.JPG, .PNG), use a tracing tool in a program like Adobe Illustrator or a free alternative like Inkscape to recreate a vector version before proceeding.
2. Simplify and Adapt for Thread:
Critically examine your logo for elements that won’t translate well to embroidery:
-
Ultra-fine lines (thinner than 1.2mm) may need thickening.
-
Small, delicate text (under 6mm tall) often becomes a blurry mess. Consider simplifying or using a bold, clean typeface.
-
Gradients and shadows need to be reimagined as solid color blocks or clever stitch direction effects.
-
Extremely complex details may need strategic simplification to remain readable when stitched.
This isn’t “changing your logo”; it’s creating an embroiderable adaptation that retains its core identity.
3. Define the Final Specifications Clearly:
Gather all decision-points before you begin. This is your project brief:
-
Garment/Fabric Type: Is this for a structured cap, a stretchy polo, a plush towel, or a tough canvas bag? The fabric dictates everything.
-
Finished Size: Specify the exact width in inches or millimeters.
-
Target File Format: For Babylock, this is typically
.PES(for newer models) or.VIP(for some older machines). Know which one your specific Babylock model requires. -
Thread Preference: If you have a brand preference (Isacord, Madeira, Robison-Anton), note it. Different threads have slightly different thicknesses and sheens.
Phase 2: The Digitizing Execution (2025 Techniques)
This is where the digital translation happens. The best practice is to use a professional digitizer or professional-grade software.
1. Choose Your 2025 Digitizing Method:
-
Professional Digitizing Service (Top-Tier Practice): The leading practice for businesses and serious embroiderers. In 2025, look for services that offer direct communication with the digitizer, a quick revision process, and expertise in specific fabrics like performance wear. You’re paying for their specialized skill in stitch physics.
-
Advanced Subscription Software (Empowering Practice): Software like Hatch Embroidery 3.0 or Wilcom TrueSizer+ offers cloud libraries, AI-assisted tools for underlay suggestions, and incredibly efficient workflows. These programs have made professional-level tools more accessible than ever.
-
Avoid “One-Click” Online Converters for Logos: While tempting, these auto-digitizers still lack the necessary intelligence for pull compensation and fabric-specific engineering. They remain a recipe for puckering and poor registration on important projects.
2. Apply Modern Digitizing Principles:
A skilled digitizer will focus on these non-negotiable elements:
-
Intelligent Underlay: The foundation. They’ll use a combination of edge-running and zig-zag underlay to stabilize the fabric perfectly, preventing shifting and puckering—the #1 cause of amateur-looking results.
-
Dynamic Pull Compensation: This isn’t a uniform setting. A pro will apply different compensation values to different shapes and stitch types within your logo to ensure circles look round and columns sit snugly next to fills.
-
Strategic Stitch Sequencing & Trimming: They’ll optimize the stitch order to minimize jumps and thread trims, which speeds up production and creates a cleaner backside. This is especially important for multi-logo runs.
-
Fabric-First Density Settings: Stitch density is tailored to your specific fabric (lower for stretchy knits, higher for stable wovens) to prevent a stiff, board-like feel or gappy coverage.
Phase 3: The Critical Test & Refinement Loop
No file should go to final production without this step. It’s the quality assurance gate.
1. The Controlled Test Stitch:
-
Use the exact fabric and stabilizer (cutaway for knits, tearaway for wovens) planned for the final product.
-
Hoop it correctly with proper tension.
-
Stitch the design on your Babylock. Observe the machine during the run—does it struggle with density or make excessive trims?
2. The Post-Stitch Analysis:
Hold the test stitch under good light and evaluate:
-
Registration: Are all color sections aligned perfectly? Any gaps?
-
Fabric Integrity: Is there puckering, waving, or distortion of the base fabric?
-
Detail Fidelity: Is text crisp? Are curves smooth?
-
Tactile Quality: Does it feel appropriately flexible or is it stiff like cardboard?
3. The Revision Request:
Provide specific, actionable feedback to your digitizer: “The inner blue circle is stitching as an oval, please increase pull compensation on that element,” or “The satin stitch border on the ‘A’ is puckering the knit fabric, please reduce density.” A good 2025 service expects this and includes 1-2 rounds of revisions.
Phase 4: Production & File Management Best Practices
1. Create a “Digital Master” Library:
Organize your finalized .PES/.VIP files in a cloud-synced folder (like Google Drive or Dropbox) with a clear naming convention:
ClientName_Logo_Version_Fabric_Size.pes
(e.g., AlphaCorp_Logo_V2_Polo_3in.pes). Include a note file with the fabric and stabilizer used in the successful test.
2. Respect the Resizing Rule:
Need the same logo at 50% smaller for a hat? Do not simply scale the design in your machine. Significant resizing distorts stitch density and pull compensation. Commission a new, separately digitized file optimized for that specific size and substrate. Some advanced software can now “resize with compensation,” but a dedicated file is still the gold standard.
3. Maintain Your Machine for File Fidelity:
Your perfect file needs a well-tuned machine to execute it. In 2025, best practice includes:
-
Using quality embroidery needles (75/11) and changing them every 8-10 hours of stitching.
-
Using high-quality, low-lint thread to avoid tension issues and machine jams.
-
Keeping your Babylock clean, oiled, and calibrated according to the manual.
Conclusion: The Path to Flawless Brand Representation
The journey to Convert Logo To Embroidery For Babylock in 2025 is a deliberate and informed partnership between you, the digitizer, and your machine. It moves far beyond simple file conversion into the realm of textile engineering. By embracing these best practices—meticulous preparation, leveraging professional digitizing skills, insisting on a test stitch, and managing your digital assets wisely—you ensure that your logo makes the transition from screen to fabric with integrity and impact. Your Babylock is a tool capable of exquisite work. Feeding it a thoughtfully crafted, modern .PES file is how you unlock that potential, turning every stitched item into a testament to quality.